
I made this scarf for my mom for Mother's Day! It was time consuming for me because I had to restart the whole project three different times (I'll elaborate what I didn't do correctly at the end). Learn from me and make your own ruffled scarf.

May I just say that it is really hard to take a picture of yourself wearing a scarf in the bathroom mirror? But I wanted to show how I intended for the scarf to be worn (looped around the neck loosely and then pinned in place with the flower pins.)

You start this project with a t-shirt. It's a great color of yellow, perfect for May. Iron the shirt if necessary and cut it off underneath the logo. Cut straight through the front and back of the shirt, you'll need both sides and you'll want as few seams as possible. I used a size large shirt.

I used my rotary cutting mat to make sure the cuts were square. I cut off the hem.

I wanted two narrow pieces, so after finding that I had 12 1/2" of fabric, I cut it into two 6 1/4" strips.

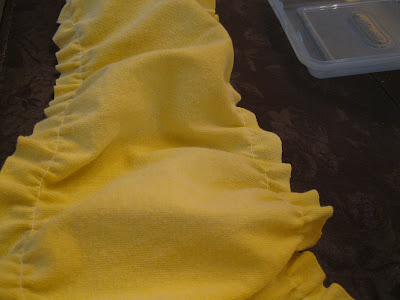
My two strips:

The strips will be tubes, so cut each one at the side to make them single long pieces of fabric.

Place the right sides together and sew the two long strips with a running stitch, backstitching at both ends.

Now comes the sewing part. It is key to use an unmatching color of thread when doing the gathering/ruffling stage of this project. Turn the tension on your machine as high as it goes and then increase the stitch length to the longest possible. Sewing 5/8" from the edge of the scarf, gather both sides. Repeat on each side. (You've gathered each side twice at this point.) You'll be removing these stitches later, so it doesn't really matter what they look like.

Next, change out your thread with a matching color (I used white, but it isn't that noticeable.) Using a stretch stitch, sew a straight line next to each side of the scarf. I sewed about 1/2" from the edge. These stitches will not be removed.

Final step for the scarf, remove the contrasting thread ruffle stitching.
To make the flowers, cut 4 3/4" strips from the sleeve of the shirt. They will not be completely even/level at the seam, so cut out the uneven part. (See how the seam kind of goes into a V?)

Here's the tutorial I posted awhile back for making fabric flowers if you want more pictures.
Here's the nutshell version:
Sew two of the strips together and gather the strip the same way as you did for the scarf. Try to stay close to one side of the strip.
To start rolling the flower, unruffle about 1" of the strip. Fold this small part of the strip that will become the middle piece down into a triangle with wrong sides together.
Hand sewing as you go, roll the ruffle into a flower.

This is sort of a ghetto way to attach the flowers, but I wanted them to be movable and ran out of actual pin backs. I do have tons of safety pins left over from my husband and I running 10k (in his case, half or full marathon) races, so it is good to use a few!


Anyway, when I did this project initially, I used the same thread to do the ruffling and the final stitching. I ended up cutting the final stitching in several places had had to go back, rip it all out, and re ruffle and then re-stitch three times. Also, I used a regular length running stitch the first two times (not the stretch stitch) and it just didn't stay too well! Those are the mistakes I mentioned earlier.
I think my mom will love the scarf. She loves colorful things.

I'm sorry that my pictures look so dreary! Maybe that's because it has been raining for four days straight...


Dreary? No way! How cool and easy does that look. I just might have to try it. :)
ReplyDeletehope it turns out well!
ReplyDelete